Introduction
So, over the course of the last year, I have automated most of the main items in my house….
However- one item which has so far eluded me, is my fireplace. NOT- because it is difficult, but, rather because it has been quite hot outside. Well- today I finally made it happen.
Disclaimer- Amazon affiliate links are used in this article. For this site, I choose to not pesture my audience with annoying advertisements, and instead, only rely on affiliate links to support this hobby. By using the affiliate link, you will pay the same price on Amazon, as you would otherwise pay, however, a small percentage will be given to me.. To note- I DID buy all of the seen products with my own money, and did not receive any incentive to feature or utilize them.
Requirements
- Device needs to be small.
- Needs to be protected against accidental shorts.
- My kids may be tempted to touch, and grab it. It needs to NOT shock them, or be damaged in the process.
- Automation controlled via Home Assistant / Node Red.
Based on my list of requirements, and my on-hand stock of electronical goodies, I decided to go with a NodeMCU, and coat the entire module in epoxy to protect against shorts, corrosion, kids… etc.
Required Parts
-
NodeMCU – Typically around 3-5$ each with free shipping.
- I used this because I had these in-stock. If I had to order new devices, I would have went with a….
- D1 Mini – Typically 1-3$ each. Has all of the required features, and is smaller.
- BME 280 – Not required, however, I enjoy having additional temp/pressure/humidity sensors around my house.
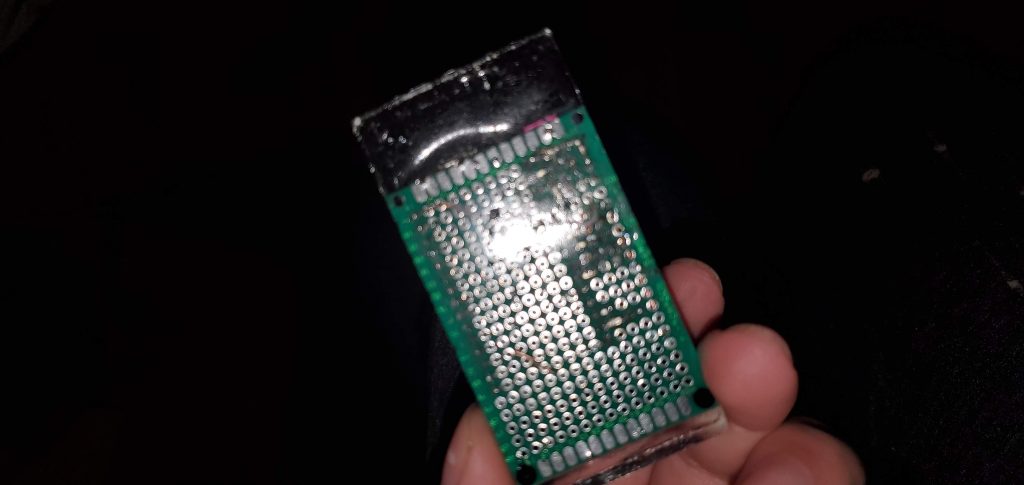
- Prototyping Board – Makes a quick foundation for projects.
-
Relay Module – Generic – Ensure your relay can be activated via either 3.3v OR 5v. a 12v relay will NOT work. Also, ensure the relay is rated for the current / voltage you intend to use it with.
- D1 Mini Relay Module – If you choose to go with a D1, you can get a module which you can directly solder up to your D1 mini, making your project footprint much neater, and smaller.
If you choose to use epoxy, here is the epoxy I utilized:
If you happen to know of a cheaper epoxy which is just as effective, please let me know.
Wiring Guide
I don’t have a full-blown wiring schematic, however, here are pointers.
If your relay module is 5v, connect the + terminal to the “VIN” plug on your NodeMCU (which will output 5v if you are connected via USB.) or the “5V” pin on your D1 mini.
If your relay module is 3.3v, connect the + terminal of your relay module to the “3V3” pin on your NodeMCU, or the “3V3” pin on your D1 Mini.
Connect the – / GND terminal on your relay, to any “GND” pin on your NodeMCU / D1 Mini.
Connect the “trigger” pin from your relay, to D5 and/or D6 on your D1 / NodeMCU. You can use other pins if you wish, just ensure your selected pin, is not listed as a “Special PIN”.
If you wish to use a BME280, it will be connected to your device, via i2c bus.
Connect the “VIN” pin from the BME280, to the 3v3 pin on the nodemcu / d1.
Connect the “GND” pin from the BME280, to the GND pin on the nodemcu / d1.
For my build, I designated pin D1 as SCL, and pin D2 as SDA. Connect the relevant pins from the BME280, to your module.
Assembly
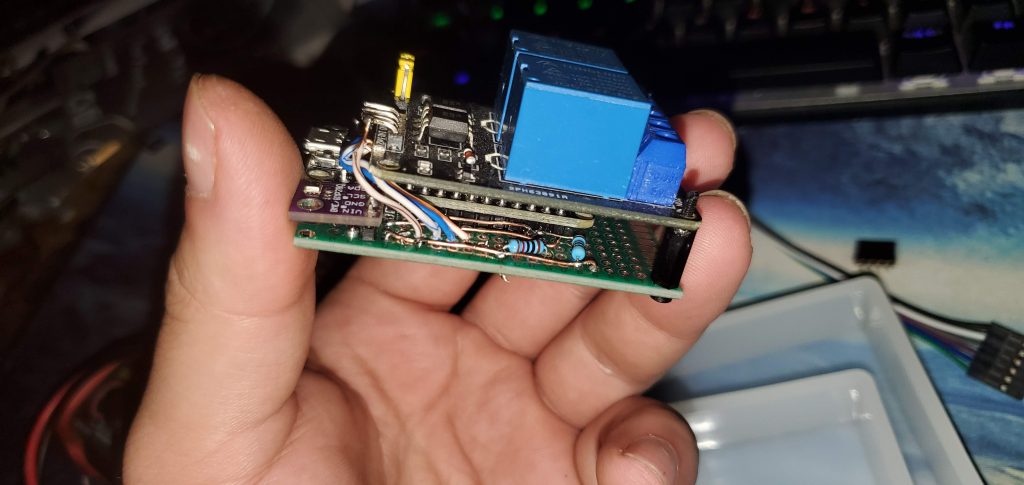
So, I didn’t take any good pictures during the breadboard work, or during assembly… but…
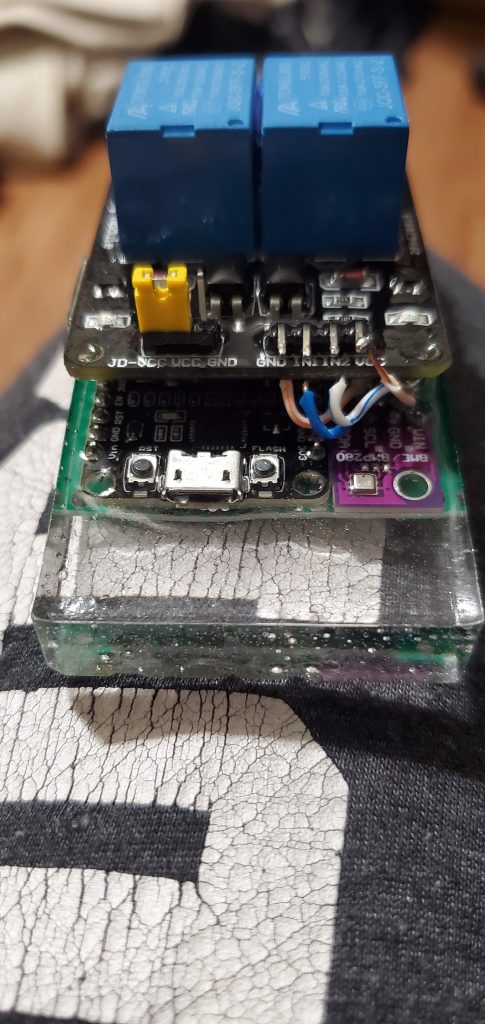
Here is a shot from the right side, showing the resistors for the i2c bus, and my copper “bus” lines. I sandwiched the relay as close to the nodemcu as possible, without the modules touching. Since my relay module pin location was not optimized for the layout of my NodeMCU / prototype board, I used copper lines salvaged from a piece of ethernet cable to make the connections.
Do notice, I used a double relay module, to both optimize the foot print, and for future expansion capabilites.

I used these Silicon Epoxy Molds for casting the module in epoxy. Don’t forget Release Agent!
I would also recommend buying a few cheap, disposable mixing cups to ensure you accurately measure your epoxy…. and because it has the habit of being pretty difficult to remove…
So- before you start pouring your epoxy… Make sure you measure the correct amounts, and MIX THOROUGHLY!!!
When you start to pour, pour very slowly! I did find a blunt tip syringe comes in handy for covering areas which will not be submerged in epoxy.
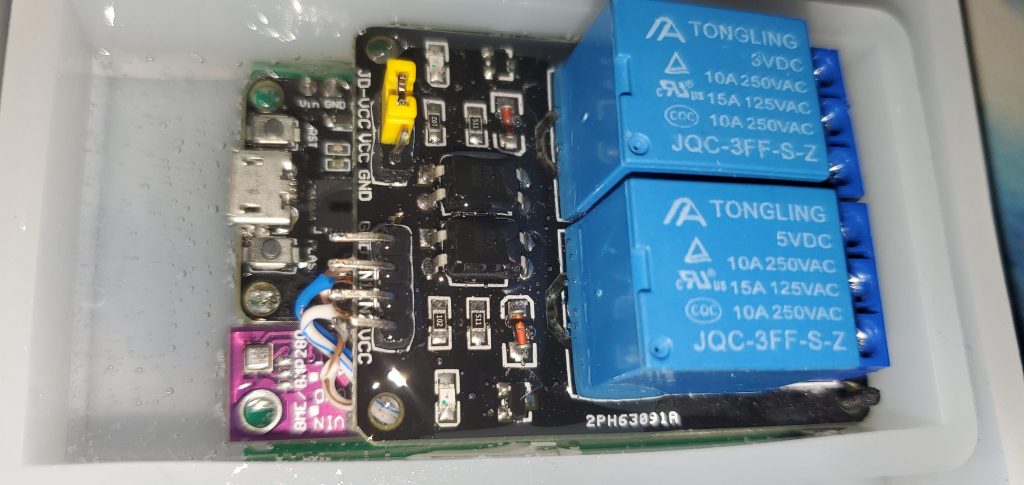
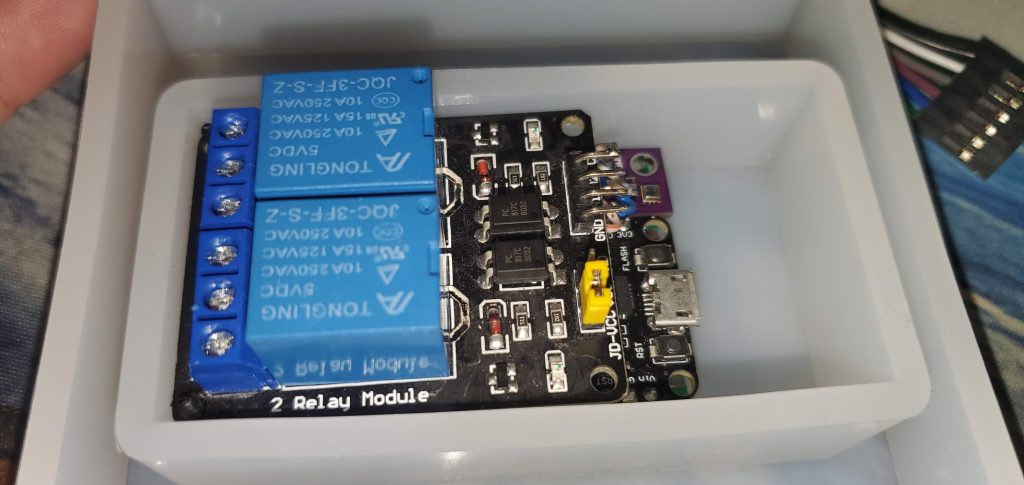
My goal was to mostly cover the nodeMCU, and all exposed terminals. I covered the relay board using a syringe. My goal was to also NOT cover the USB terminal, or the BME280.
The BME280 did survive, uncovered, however, the USB port… is no longer usable.
For the final product-
The bottom of the module is covered well enough to prevent shorting of the contacts.
I could use a hacksaw or bandsaw to remove the excess on the end, however, this module will hardly ever see the light of day.
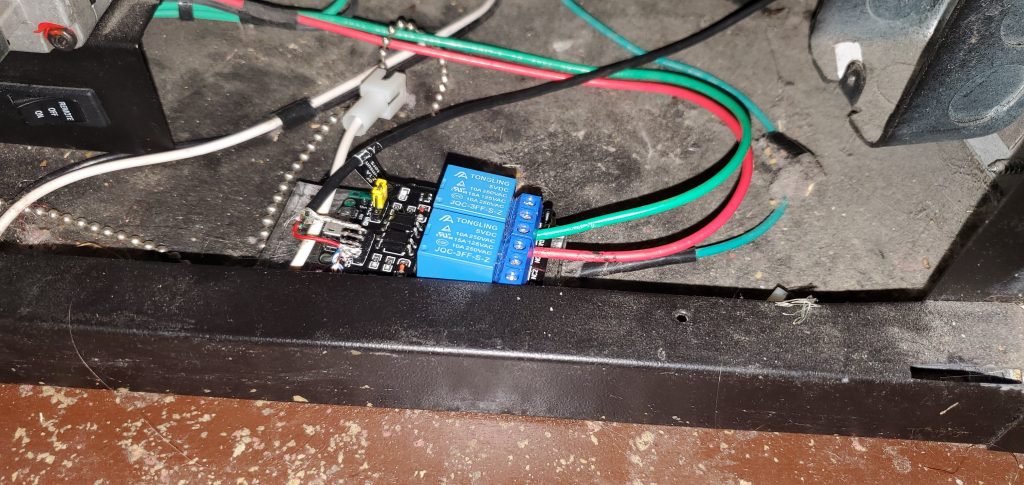
The final step at this point, was to improvise a method on how to power the device, and…. place it in its final destination.
My natural gas fireplace uses its own thermopile / solenoid , and does not require power. In short- if you switch it to “remote” and the green wire and red wire touch, it turns on.
To power the module, I chopped the end off of a USB charging cable, and soldered the leads to the exposed pins on the relay module (which are directly connected to the VIN pin on my NodeMCU.)
The fireplace pins are connected to the COM (Common) & NO (Normally Open) pins on the relay.
I highly recommend using the normally open pin, because in the event of a failure of your module, the relay should be left in a OPEN state.
ESP Home Configuration
Here is the configuration file I used for ESPHome
Note- I keep my secrets & common configurations in separate files.
My wifi information is stored in my common file, with all credentials stored in the secrets file.
If you utilized different pins, please ensure your configuration file is updated accordingly.
If you are not familiar with ESP Home, there are multiple guides on how to get started using either the command line, or via Home Assistant.
substitutions:
  devicename: "livingroom_fireplace"
  friendly_name: "Fireplace"
  ip_address: 10.10.1.245
  <<: !include secrets.yaml

<<: !include common.yaml

esphome:
  name: ${devicename}
  platform: ESP8266
  board: nodemcuv2


i2c:
   - id: bus_a
     sda: D2
     scl: D1
     scan: True

sensor:
  - platform: bme280
    i2c_id: bus_a
    temperature:
      name: "${friendly_name} Temperature"
      id: bme280_temperature
    pressure:
      name: "${friendly_name} Pressure"
      id: bme280_pressure
    humidity:
      name: "${friendly_name} Relative Humidity"
      id: bme280_humidity
    address: 0x76
    update_interval: 15s
  - platform: wifi_signal
    name: "${friendly_name} WiFi Signal"
    update_interval: 30s
  - platform: template
    name: "${friendly_name} Altitude"
    lambda: |-
      const float STANDARD_SEA_LEVEL_PRESSURE = 1013.25; //in hPa, see note
      return ((id(bme280_temperature).state + 273.15) / 0.0065) *
        (powf((STANDARD_SEA_LEVEL_PRESSURE / id(bme280_pressure).state), 0.190234) - 1); // in meter
    update_interval: 15s
    unit_of_measurement: 'm'

switch:
  - platform: gpio
    pin:
      number: D5
      inverted: yes
    restore_mode: ALWAYS_OFF
    name: "${friendly_name}"
    icon: "mdi:fireplace"

status_led:
  pin:
    number: GPIO0
    inverted: yes
Automation!
I wanted to be able to add some intelligence to my fireplace, so that it would work alongside my HVAC schedules. I used node-red as my tool of choice.
Here is the resulting workflow I came up with:
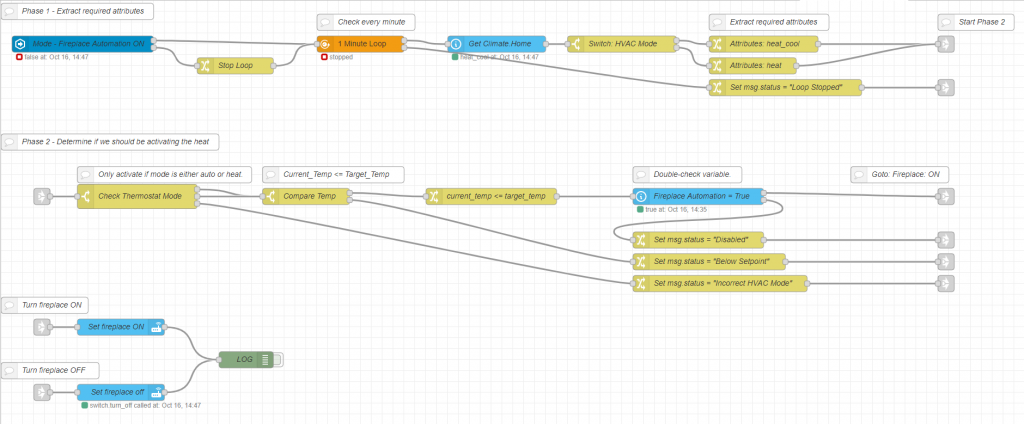
Summary:
- It is only activated when the “input_boolean.fireplace” helper is on.
- When activated, it will compare the current temp, and the setpoint every minute, and turn on the fireplace if required.
- If the thermostat is not set to heat, or heat_cool, or the helper is disabled, it will turn the fireplace off.
- I used automations in home assistant to disable the helper in the event the house is unattended, to prevent the fireplace from turning on.
- It is also only enabled during the hours of 6am -> 10pm, when we are awake.
Here is the full workflow in node-red if you wish to use it as a starting point. Removed…