Why?
Well, given my recent push to improve energy efficiency, I have reduced the average power utilization from my R720XD from 400-450w average, down to around 190w average. However, there is still more room to reduce usage.
Based on benchmarks I have seen, core should offer improved performance, which means less impact from the low-powered CPU I plan on putting into my server. As well, this should be a very easy migration from Scale to Core.
Benchmarks
Before doing anything, I ran a few simple, quick benchmarks across iScsi and SMB, to my Z2 array. I used the peak performance profile in CrystalBenchmark.
This isn’t designed to be a definitive test, but, to give me something quick to compare against.
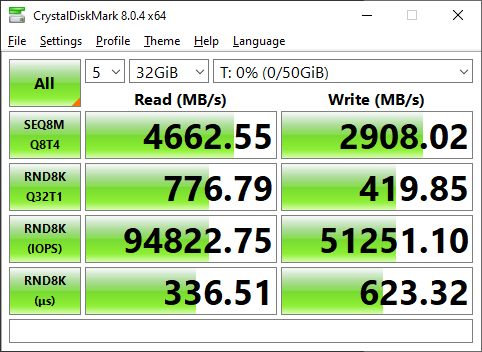
TrueNAS Scale
iSCSI
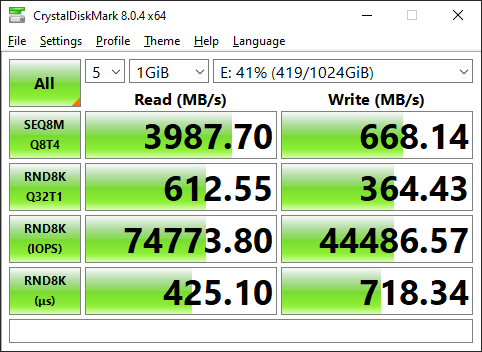
SMB
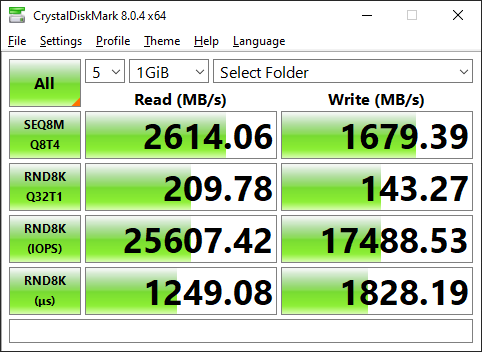
TrueNAS Core (After migration)
iSCSI
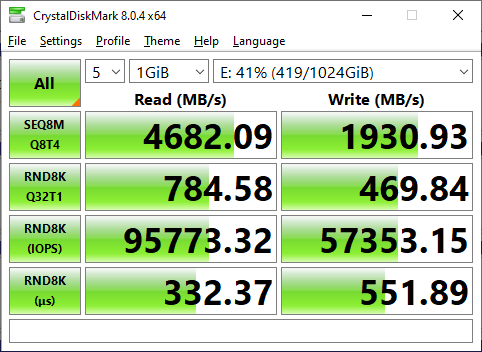
SMB
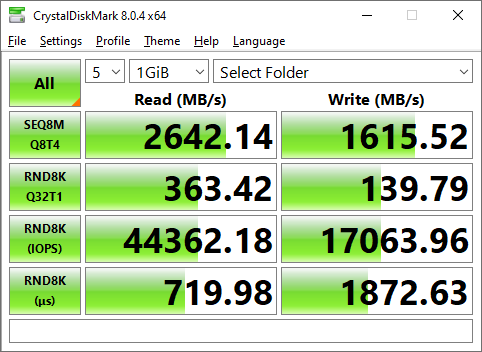
As seen above, there are numerous performance improvements across the board. Given the sole purpose of my TrueNAS box at this point in time is storage, and storage alone, this makes the decision to move from Scale back to Core all worth it.
Steps
Step 1. Backups
The first and foremost step before doing anything to your storage system, is to ensure you have working backups. Assume, your migration will fail in a catastrophic manner, leaving all of your data unusable. So, make sure you have working backups.
Step 2. Configuration Backup
With a configuration backup, you can easily restore all of your configurations to a fresh install of TrueNAS, allowing you to be back up and online in minutes. Always keep a backup!
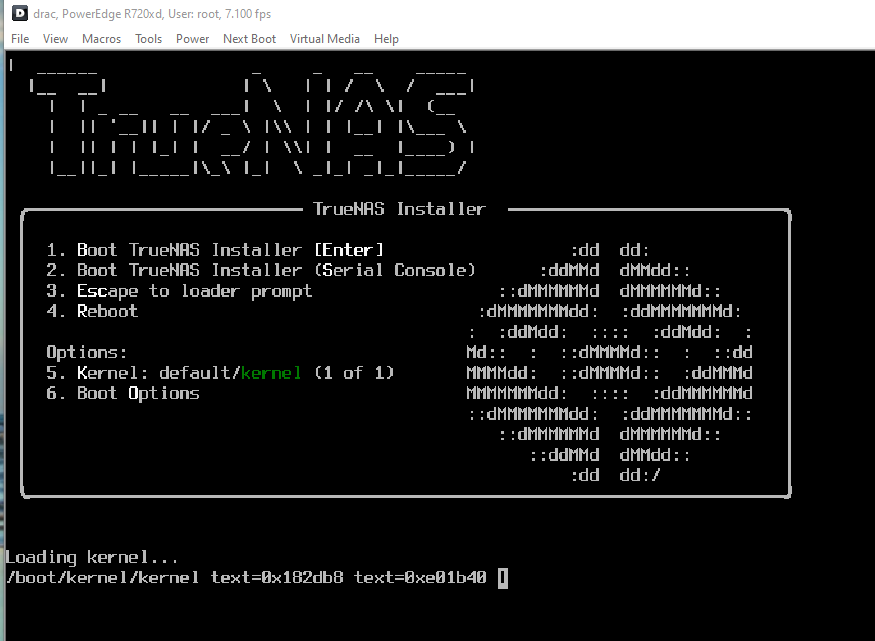
Step 3. Download the core ISO.
Download the desired release from HERE. I went with Core 13.0-RC1 assuming it would have the newer version of ZFS, minimizing potential pool compatibility issues.
Step 4. Mount / Burn the ISO.
If you do not have enterprise hardware with remote management capabilities, burn the disk to a CD/DVD/or ISO.
If you have iDrac / iLo, attach the image as virtual media.
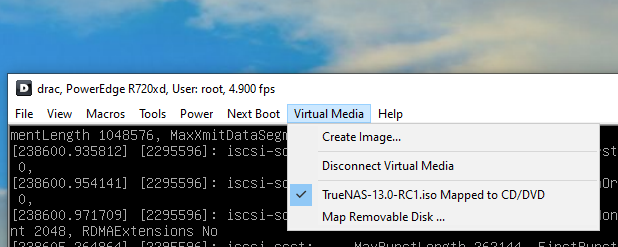
If you are using idrac/ilo, set the next boot, to boot to your virtually mapped ISO.
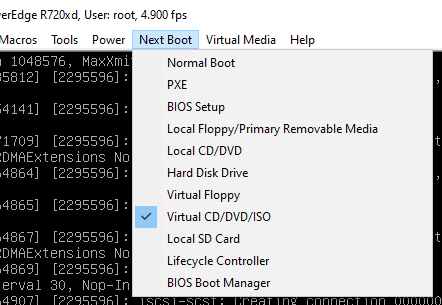
Reboot your system.
Step 5.1 – Reboot, and find unexpected memory errors
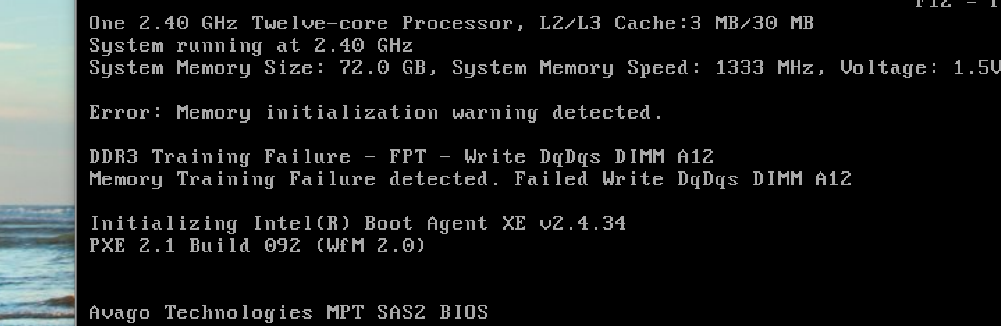
During the process of rebooting to reinstall, I had one of my Dimms fail testing. As I have recently had a weird issue popping up seemingly related to memory…. I decided to go ahead and replace the A12 dimm.
After replacing stick A12, the errors/warnings went away.
Step 5.2 Install TrueNAS Core
After you get booted to the installer, you will want to select Install/Upgrade

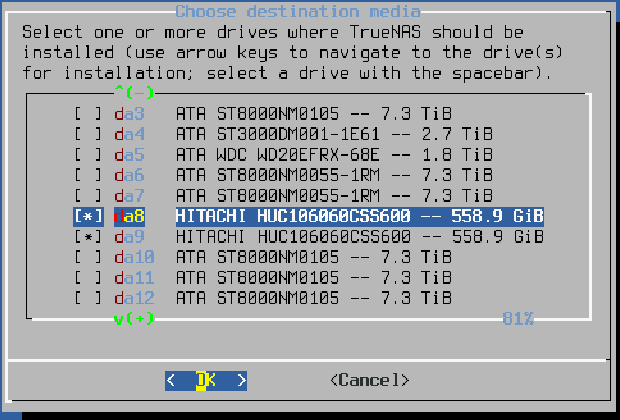
After I was prompted for which drives to install TrueNAS, I selected my two 10K SAS drives where it was previously installed.
After which, I received a prompt letting me know everything would be erased.

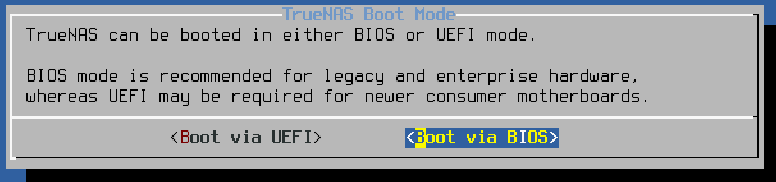
Select your desired boot mode. The r720XD will boot either mode.
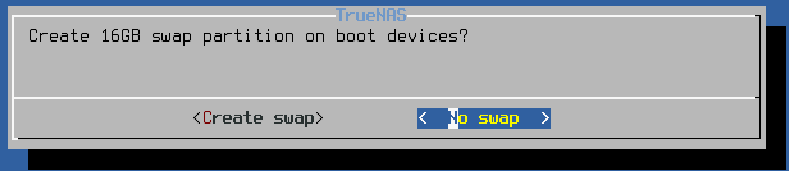
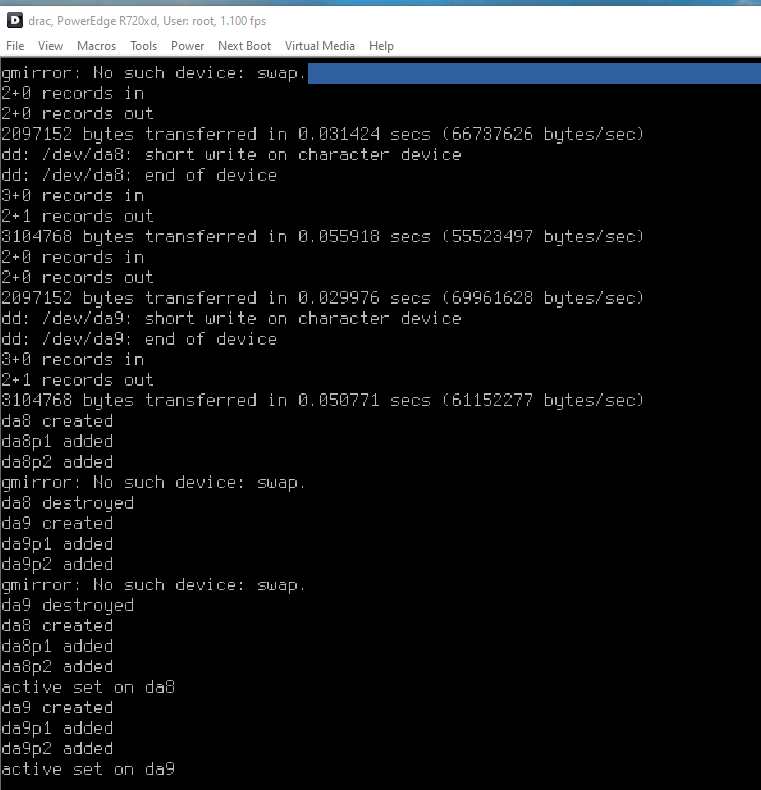
When asked to create a swap partition, I selected to not create swap (As the system has over 100G of ram…)
After finishing up the GUI-based options, a terminal appeared.
This step took a while to complete, likely due to the virtual media being accessed over the network.
After…. 10 minutes or so, Core was successfully reinstalled.

I disconnected the virtual media, and rebooted the system.
Step 6. Boot / Import Configuration
After a while, my system booted into core.
At this point, we are done using iDrac / Physical console for configuration.
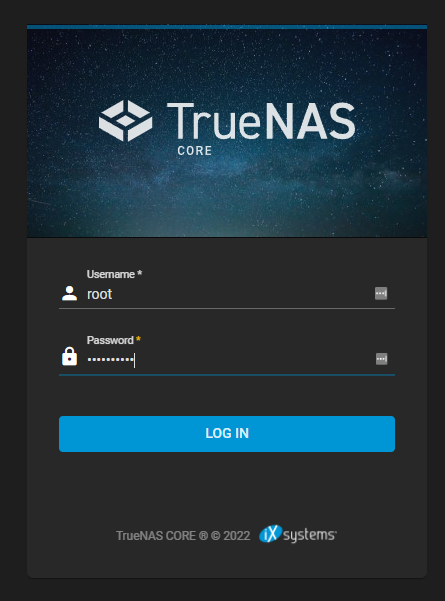
Assuming your system was able to acquire a usable IP address (I have multiple NICs configured, a few of which gave out a DHCP address), navigate to the configuration page, and log in with the password you configured earlier during the installation.
From this point, I would enjoy telling you to upload your previous configuration backup, however, my scale backup was deemed “too new” for core to import. This isn’t a big problem. Lets rebuild a new configuration.
I will start by importing my pools from scale.
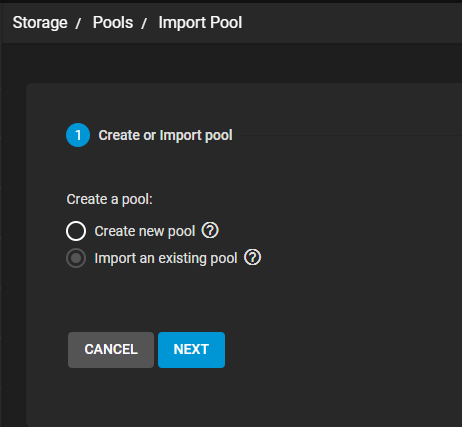
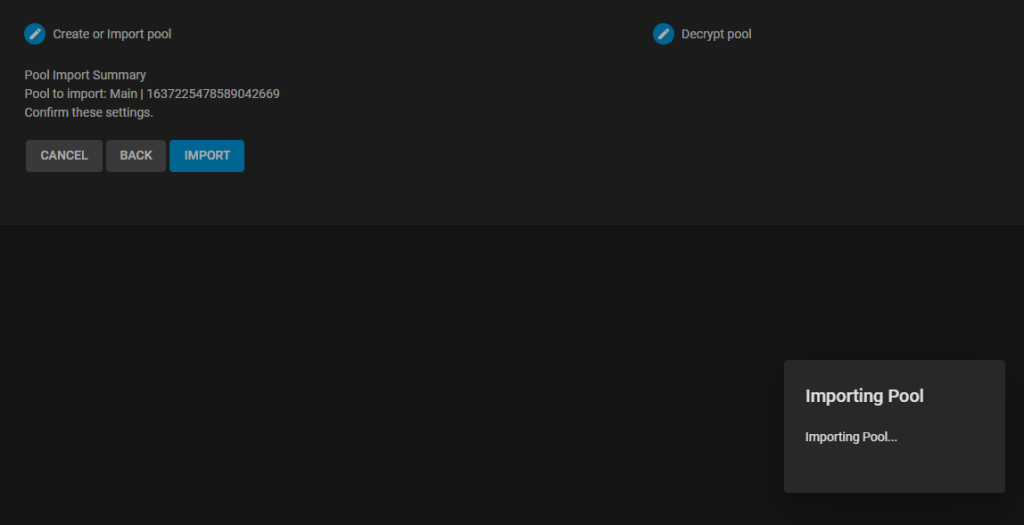
After, a long time, the pool from scale was able to successfully import.
I continued importing my other pools.
After this, I went ahead and configured my 10/40GBe interfaces. I had no issues getting the 40GBe ConnectX-3 NIC up and running.
From this point, I went through each configuration section and slowly reconfigured everything… Emails, Network, DNS, SSH, NTP, etc…
After configuring everything, I rebooted the host. It rebooted and came back online without any issues or side-effects.
Step 7. Reconfiguring iSCSI
In the previous step, I went ahead and configured most of iSCSI. However, I could not select the existing zvols as extends.
To knock out some initial testing, I went ahead and deleted the old 50G testing zvol from my flash array, and used the wizard to go ahead and setup iSCSI.
After attaching/formatting the disk in windows, I went ahead and ran a test.
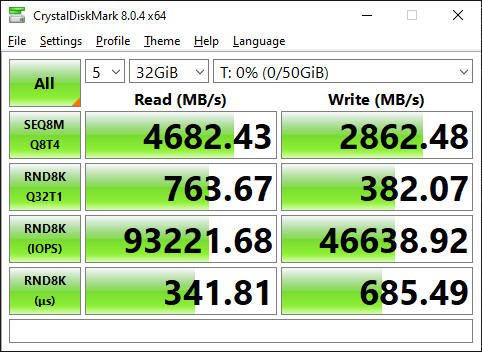
Granted, this test is against my Flash array, however, I will note the write performance is MUCH better then it was during the previous tests conducted when I replaced my core switch.
As well, I have performed no tuning, yet.
Results?
Overall, the migration was not too bad.
On a scale of 1-10, 10 being the hardest, I would give this a 6.
It would have saved many hours of reconfiguration If I were able to import my configuration from Scale. Since I was not able to, I had to go and manually reconfigured all users/groups/shares/jobs/etc. This was a pretty time consuming process.
I will note, my existing pools imported without a hitch, and I was able to get all of my iscsi mounts reattached after a few minor issues.
Getting SMB working again, took quite a bit more effort then I was expecting, however.